My MacOS Customisations

I thought I’d share some of my customisations that I do to my Macs to make life a little easier. You may not like/use them all or even any of them, however, they may come in handy for some!
Tap To Click (Touchpad)
I’ve found that being able to just tap the touchpad instead of pressing to click, is very handy. If you didn’t know about it, this is where to find it!
In Settings, scroll down on the left-hand menu, select Trackpad and you will see the screen below. There, you can switch on Tap To Click
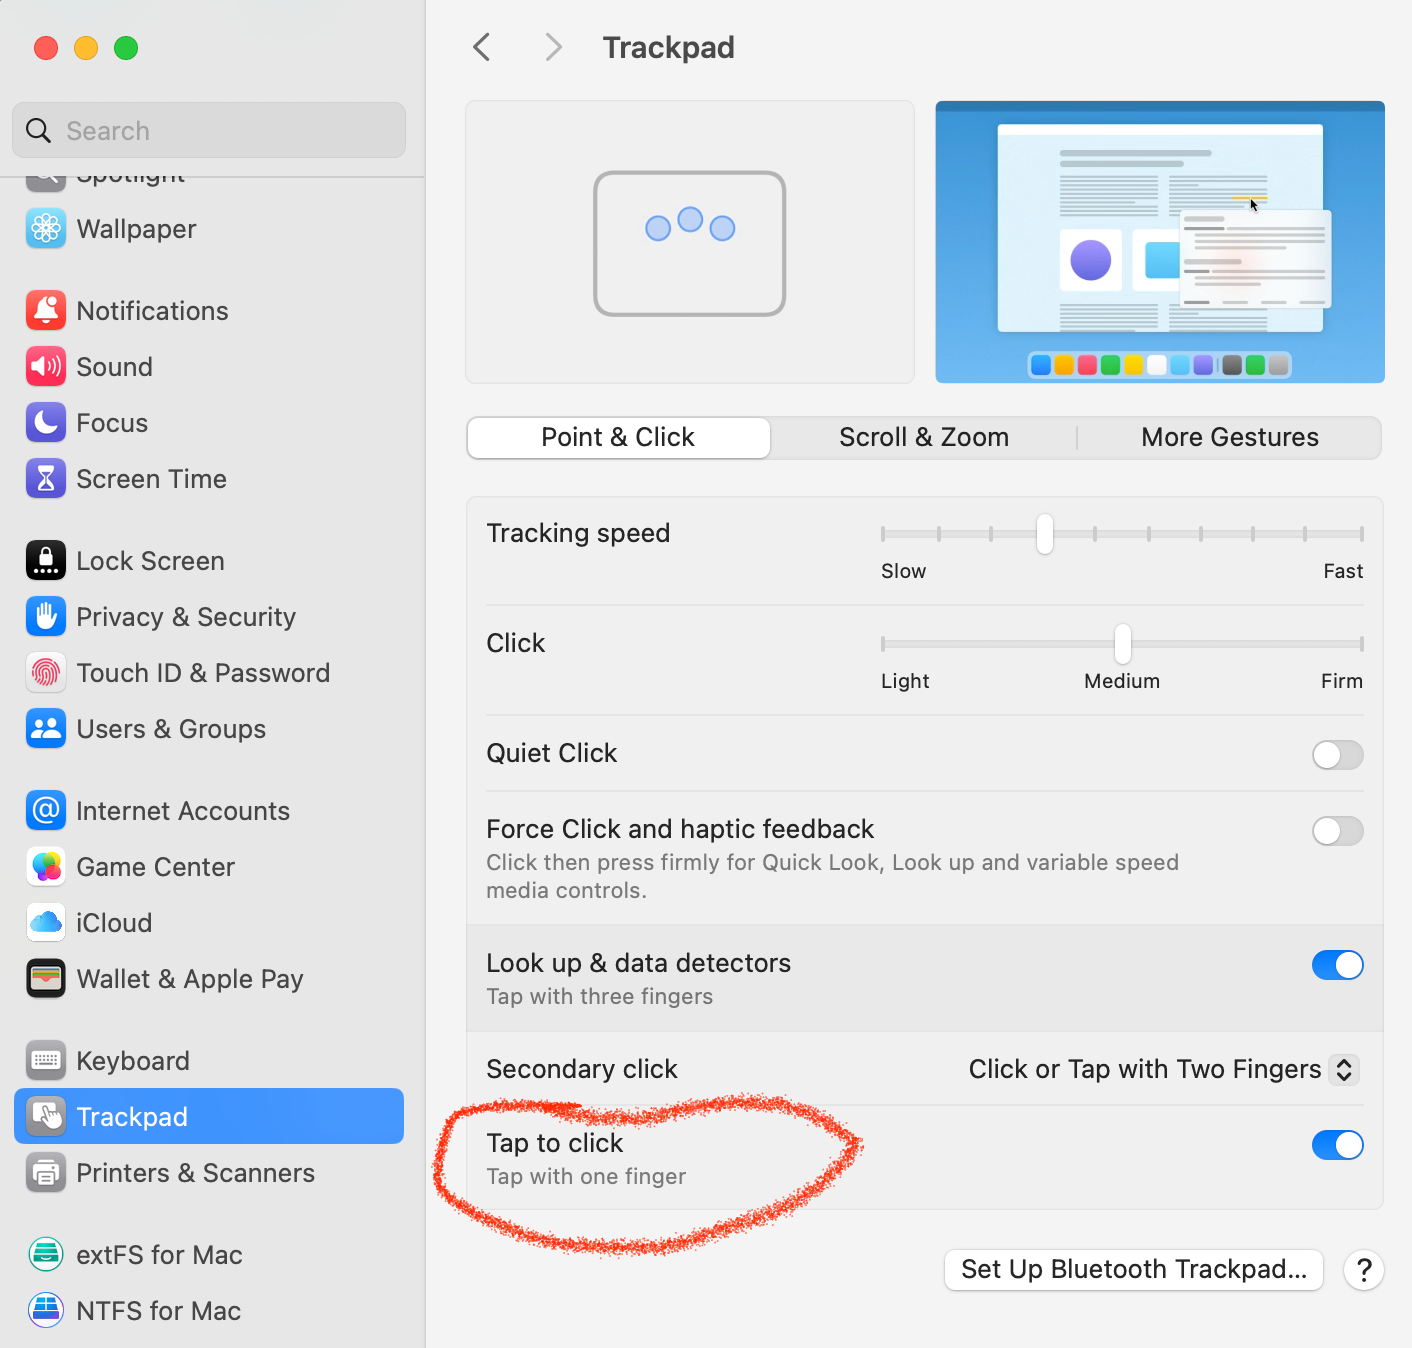
This is also the screen where you can set the secondary-click or “right-click” to tap/click with two fingers. Also, a handy thing. You cn find this directly above the Tap To Click option
Dock Magnification
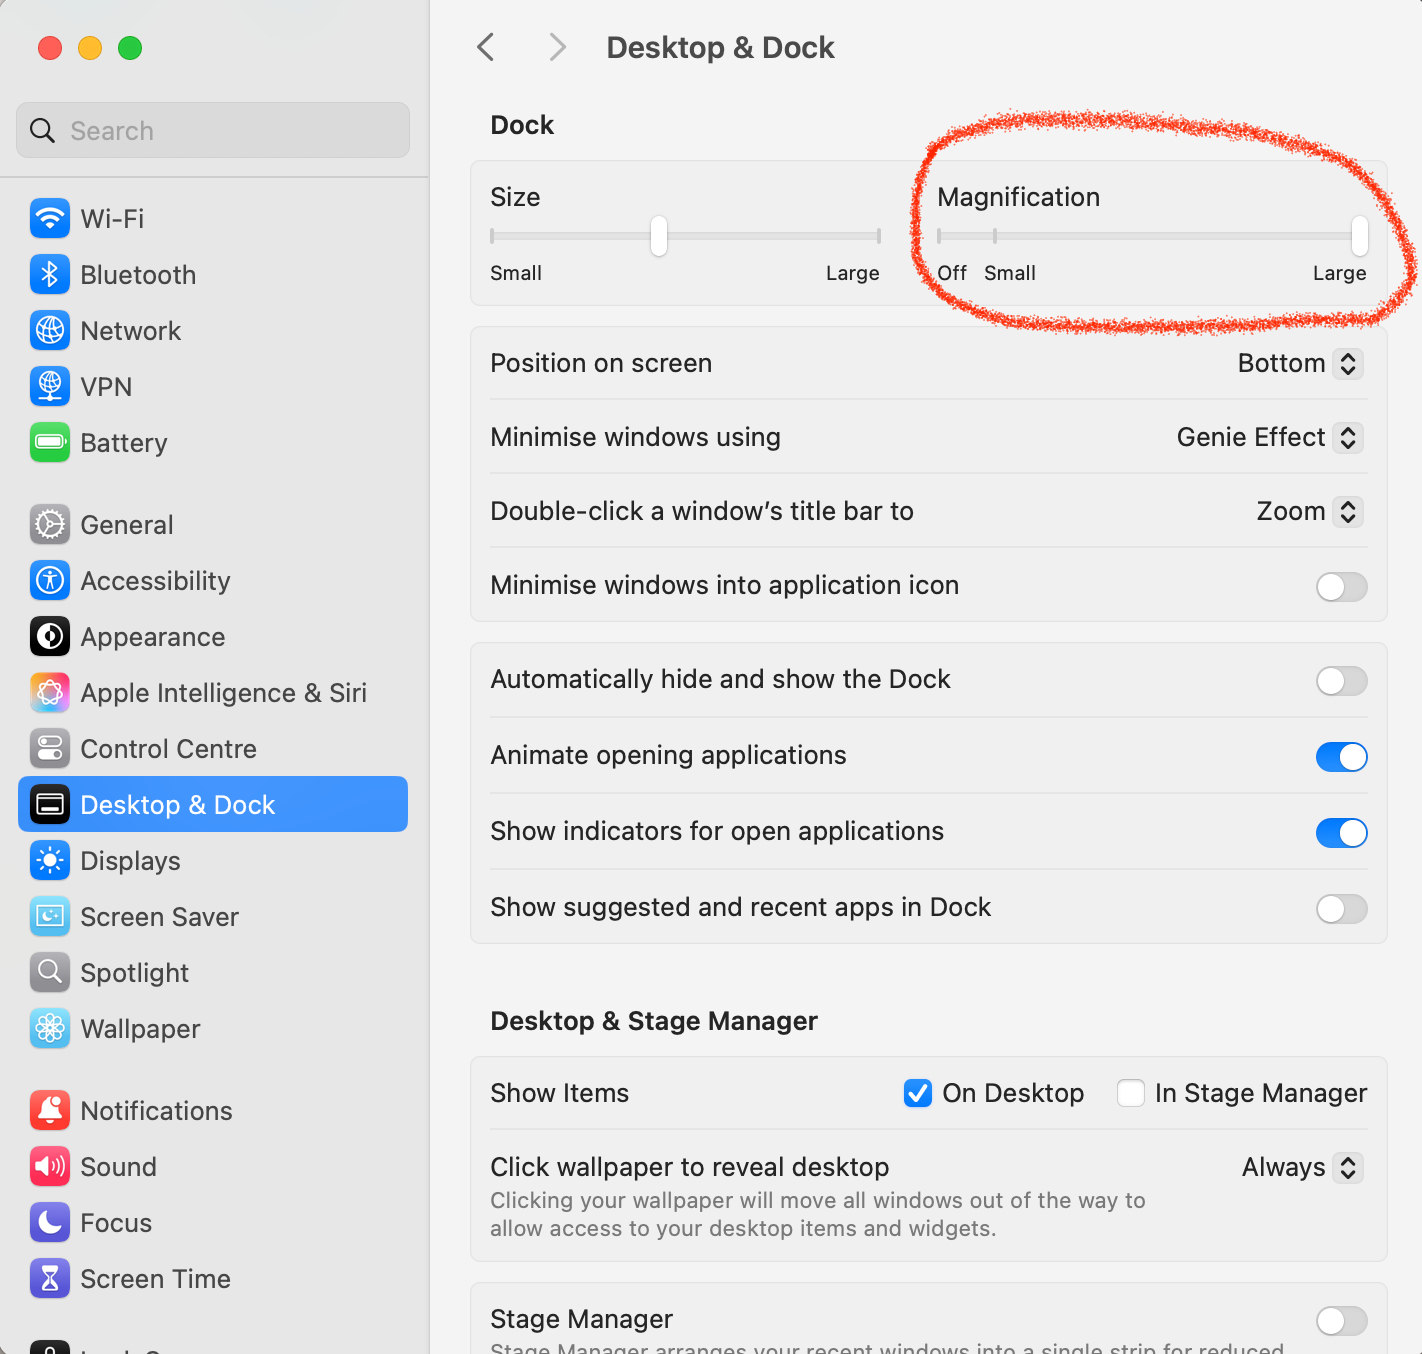
This is not for everyone but I’ve found that having magnification turned on for the dock at the bottom just gives a better indication of what app I’m about to click on. This is completely a personal preference and you will either love it or hate it.
In Settings, scroll down on the left-hand menu, select Desktop & Dock. On the right-hand pane, you will see Magnification at the top-right. You can play with the setting here.
Quick Dictation “Hotkey”
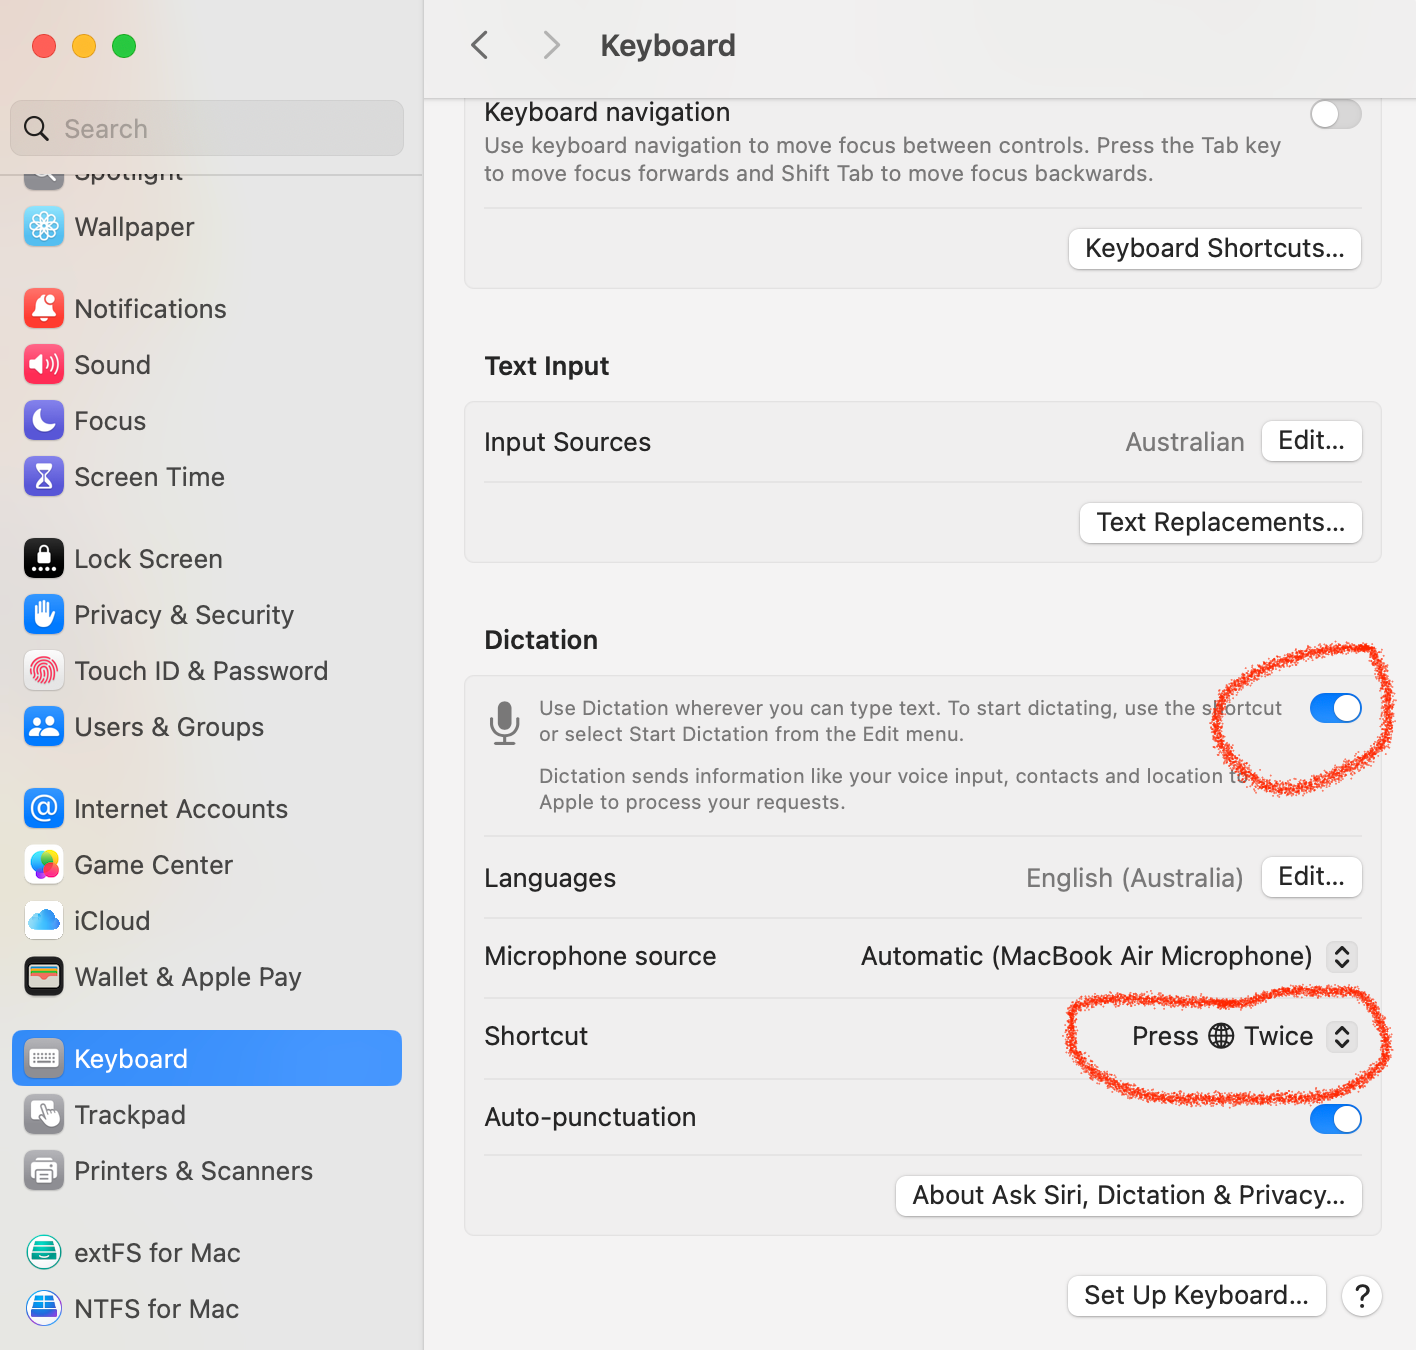
This is a nice feature to have when you get sick of typing etc. Double-Tap the Fn key and away you go! (You will need to be in a place where you can type at an insertion-point, of course.)
In Settings, scroll down on the left-hand menu, select Keyboard. In the right-hand pane, scroll down until you see Dictation. Turn that on and then you can set the “hotkey” where it says “Shortcut”.
Control-Zoom
Good for when your eyesight is not quite what it was or if you need to zoom in on something where it won’t let you because the website thinks it knows best or if pinch to zoom won’t do it. Simply hold Control down and scroll up and down with the trackpad. The best bit is, that it will centre on where your cursor is. You don’t HAVE to use Control, you can also use Option or Command - whatever works for you.
In Settings, scroll down on the left-hand menu, select Accessibility and click on Zoom in the right-hand pane.
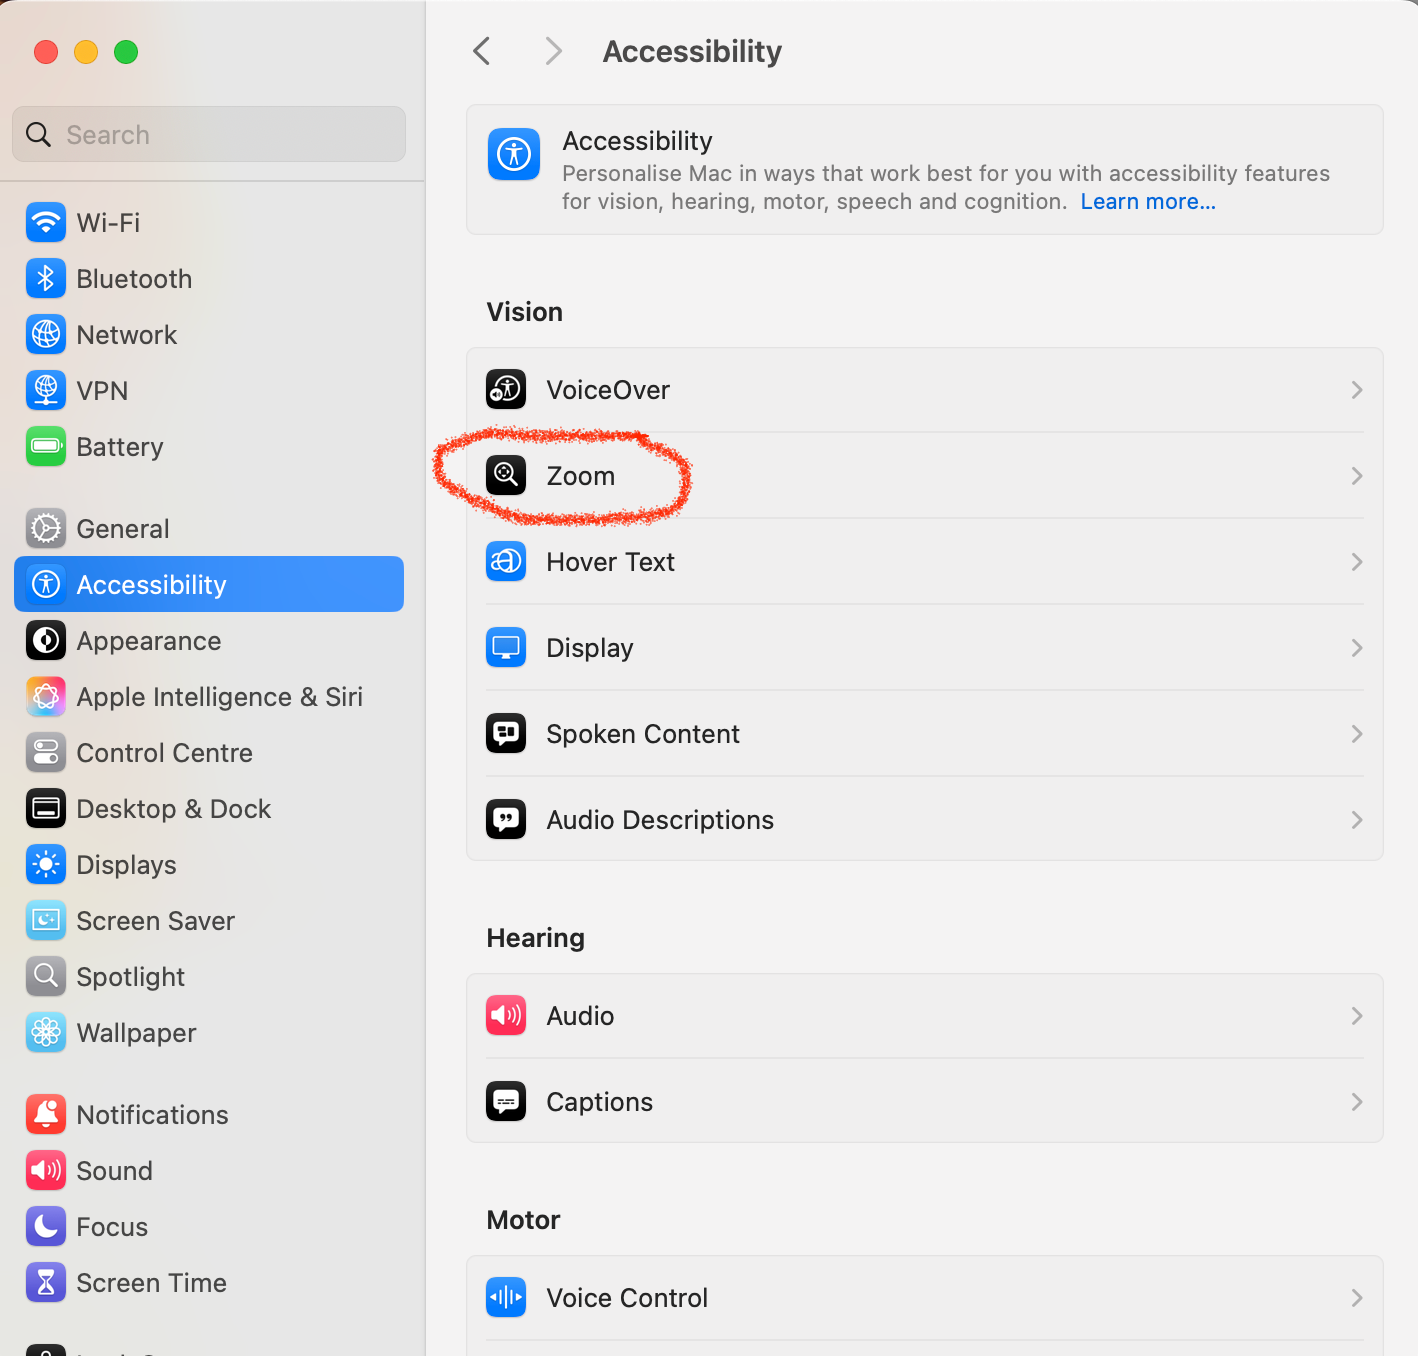
Next, in that right-hand pane, make sure “Use scroll gesture with modifier keys to zoom” is turned on and then select which key you want to use just below.
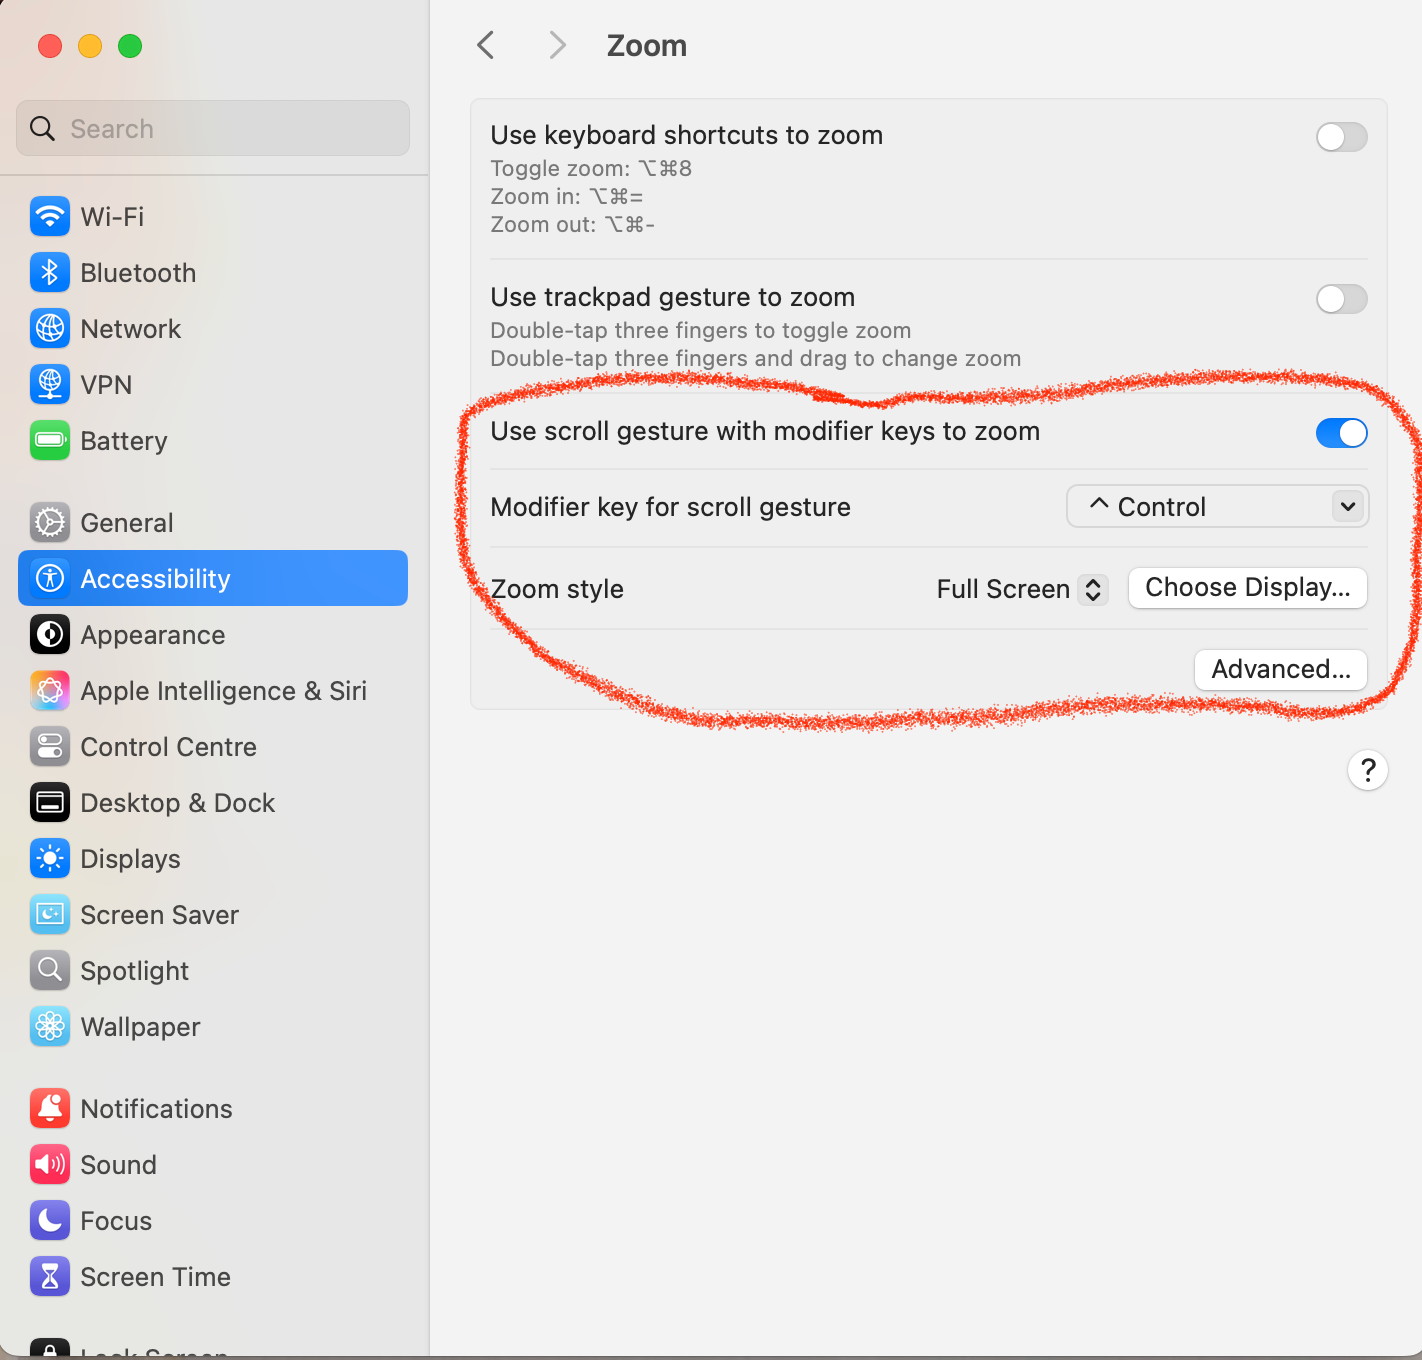
You can also fiddle around with the Zoom Style. There are a few different options and you will soon find the one that you like.
Three-Finger Drag (Touchpad)
Rather than having to tap/click and hold to drag, I have another feature turned on called Three-Finger Drag. It’s very handy to be able to just move windows/text by placing three fingers on the touchpad.
In Settings, scroll down on the left-hand menu, select Accessibility.
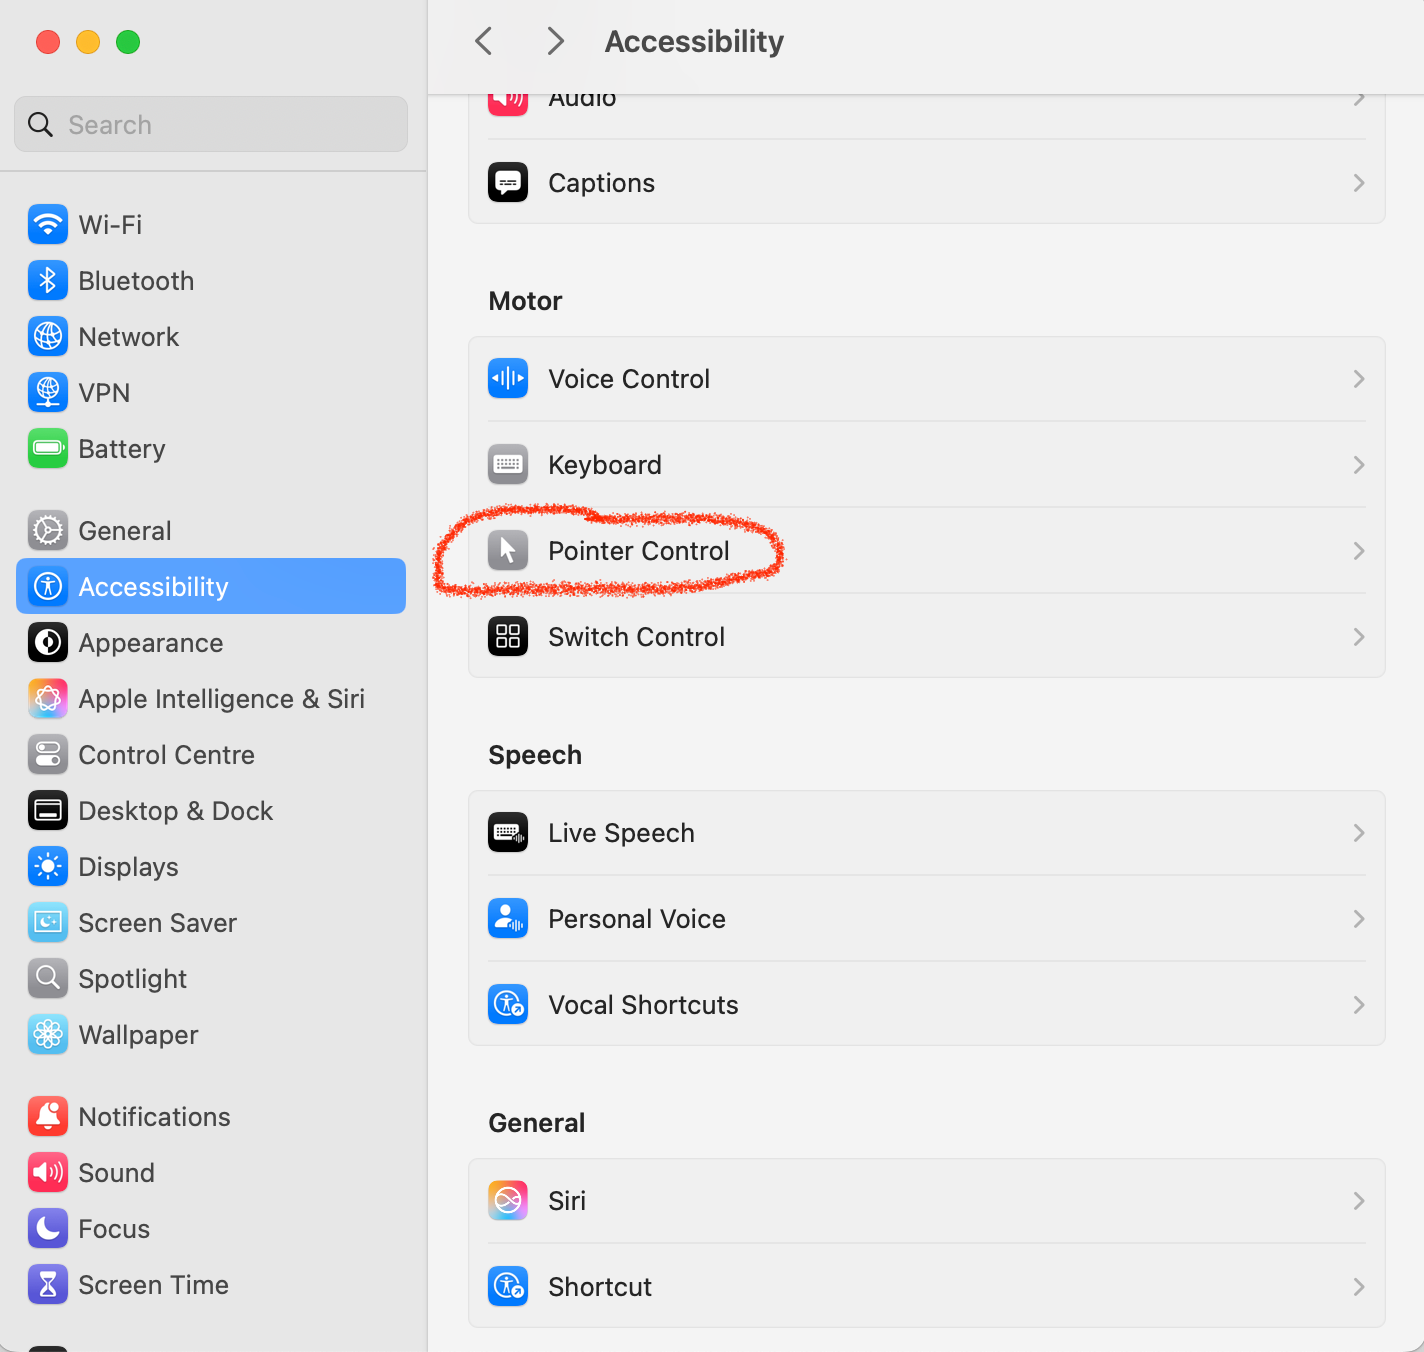
In the right-hand pane, scroll down and click on Pointer Control. On the right-hand side, you will see an option called “Trackpad Options…”. Click on that.
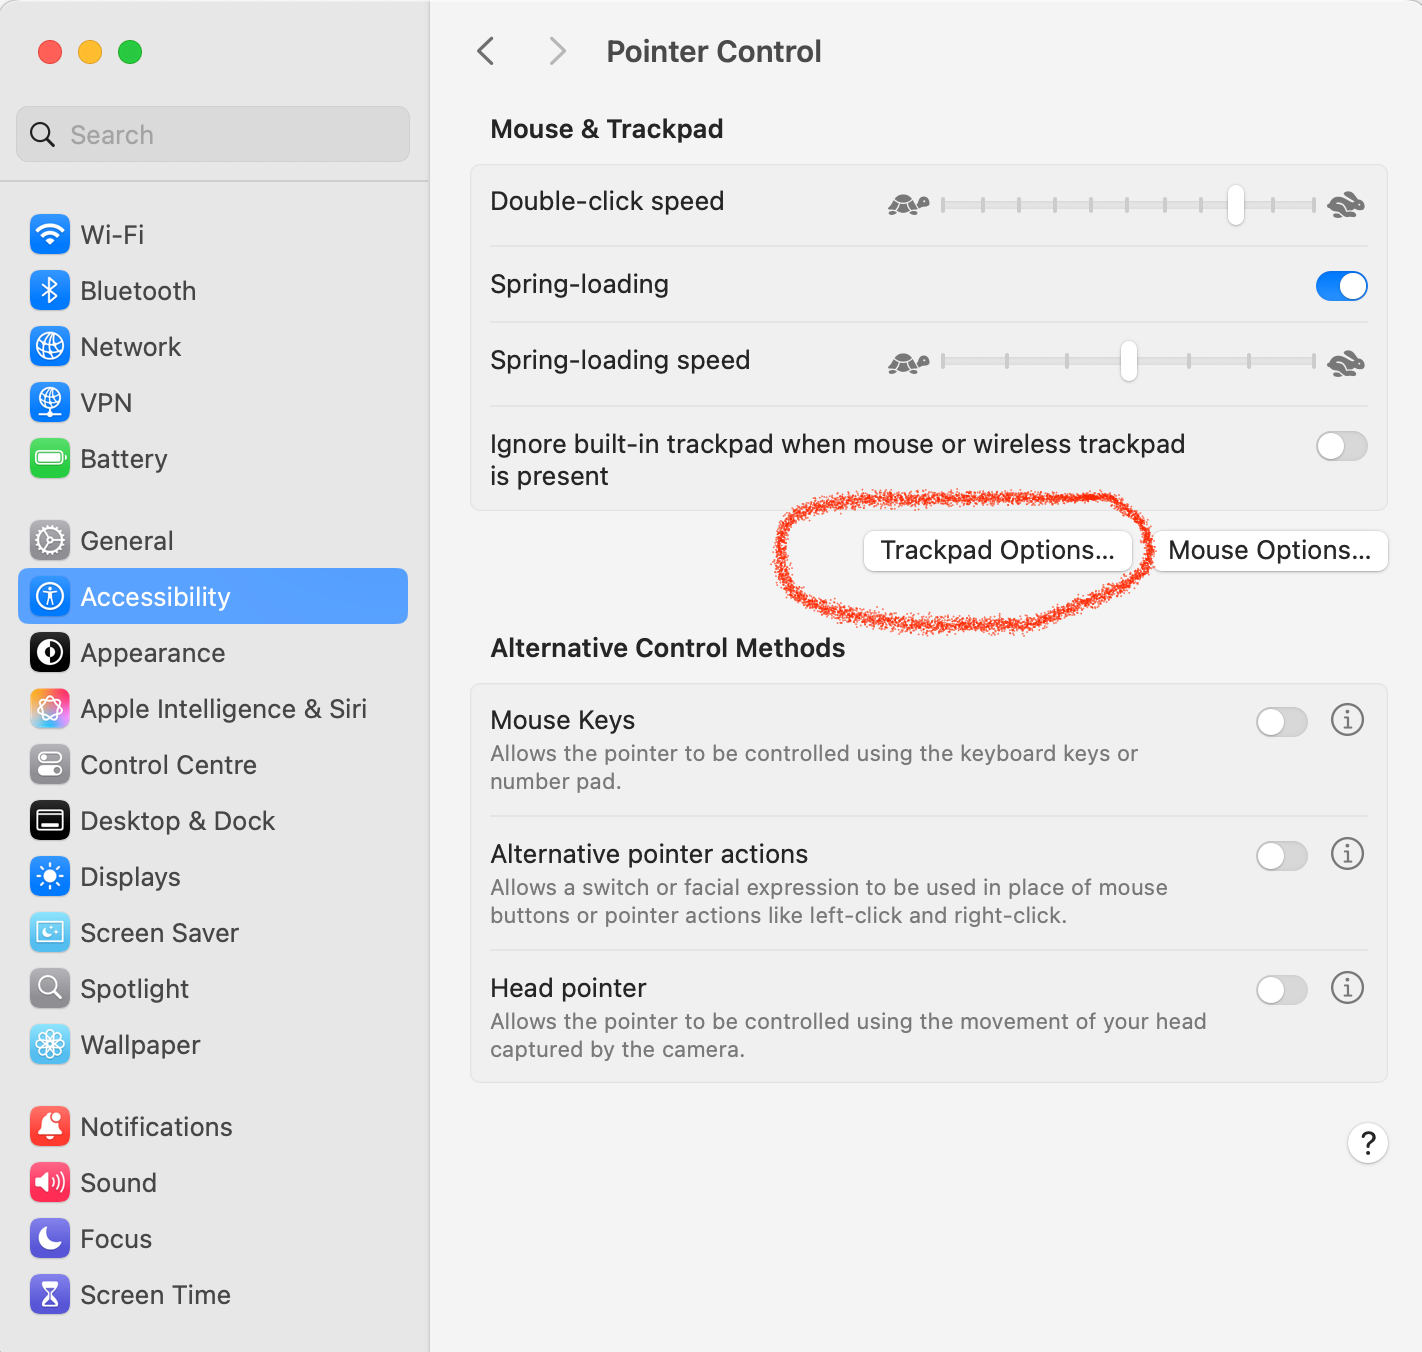
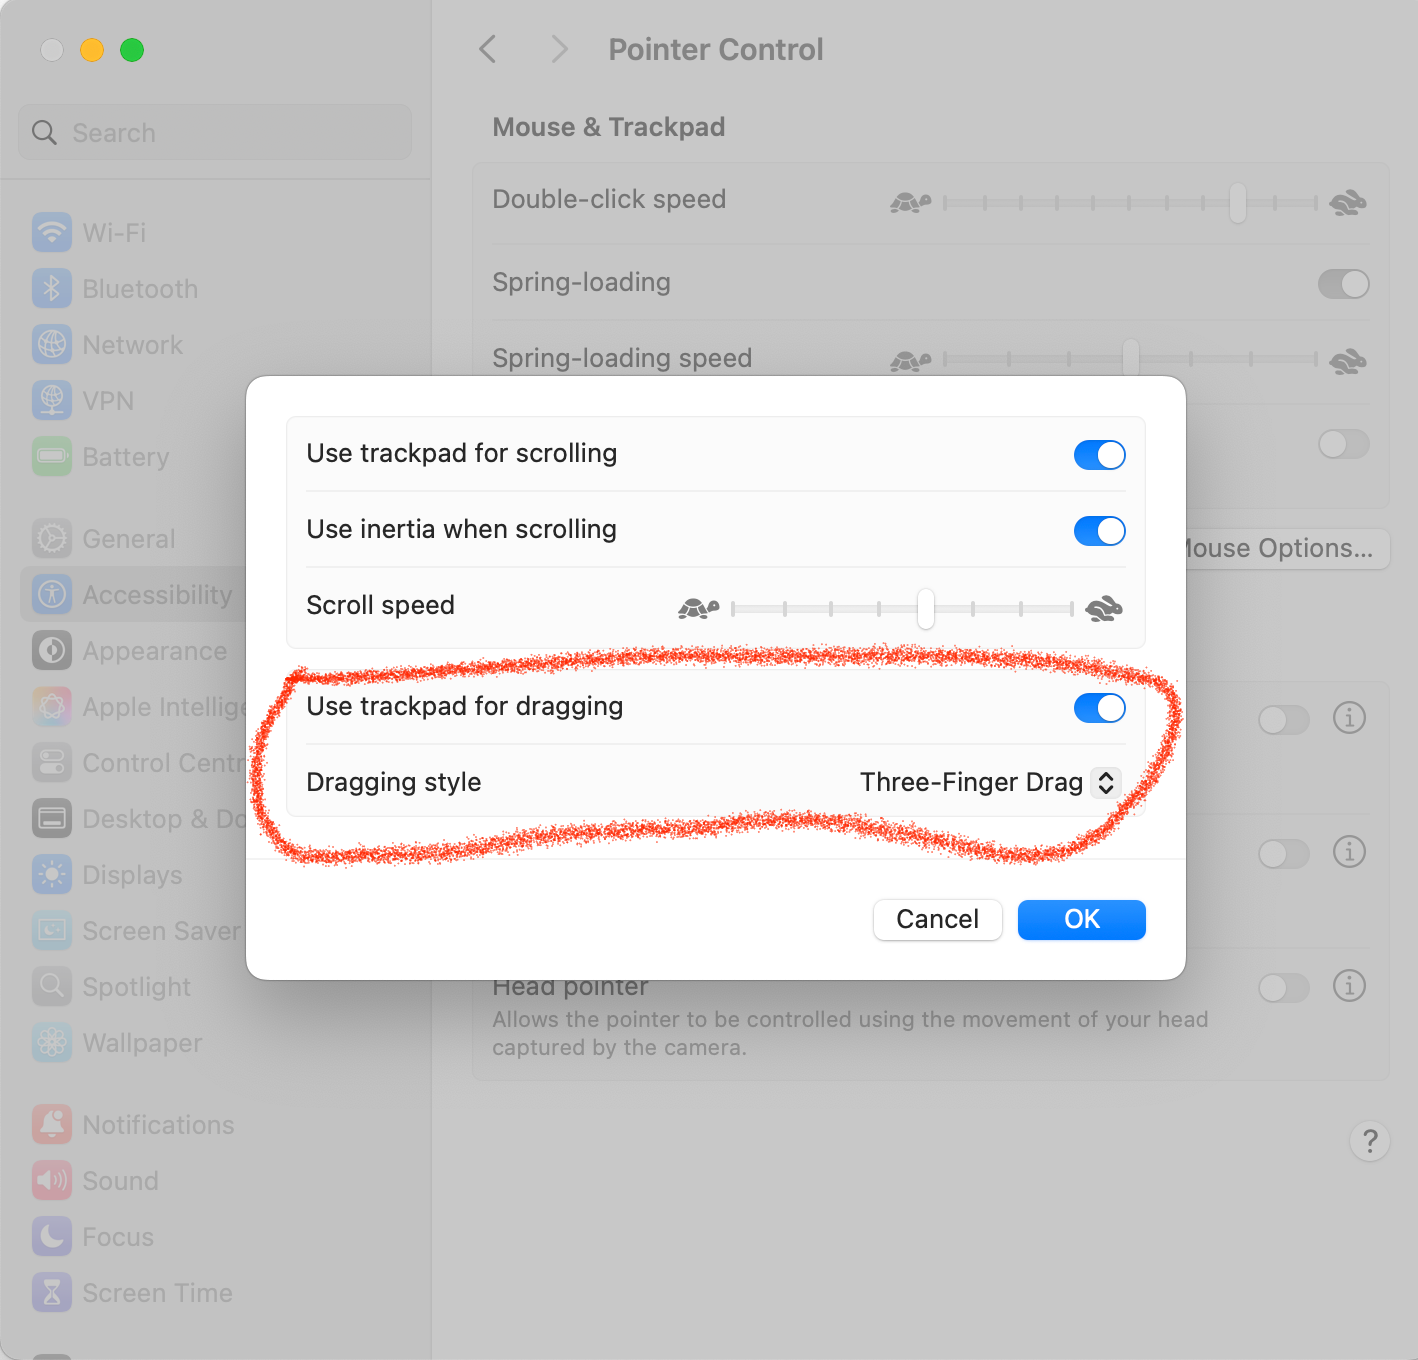
Turn on the “Use trackpad for dragging” option and then you can change the Dragging Style to Three-Finger Drag or another one of your choice.
Shake To Locate
This is a great feature to have, not just for the elderly or people with eyesight problems. It’s also great for when you have multiple screens connected to your Mac. Sometimes, in all the traversing around the screen or external screens, you can (believe it or not), lose the mouse pointer and it can take a few seconds to find it.
This feature will momentarily zoom the pointer to a greater magnification so it sticks out on the screen when you move the mouse quickly back and forth or just move your finger quickly back and forth on the touchpad.
In Settings, scroll down on the left-hand menu, select Accessibility and click on Display in the right-hand pane.

Now, you can switch on “Shake mouse pointer to locate”.
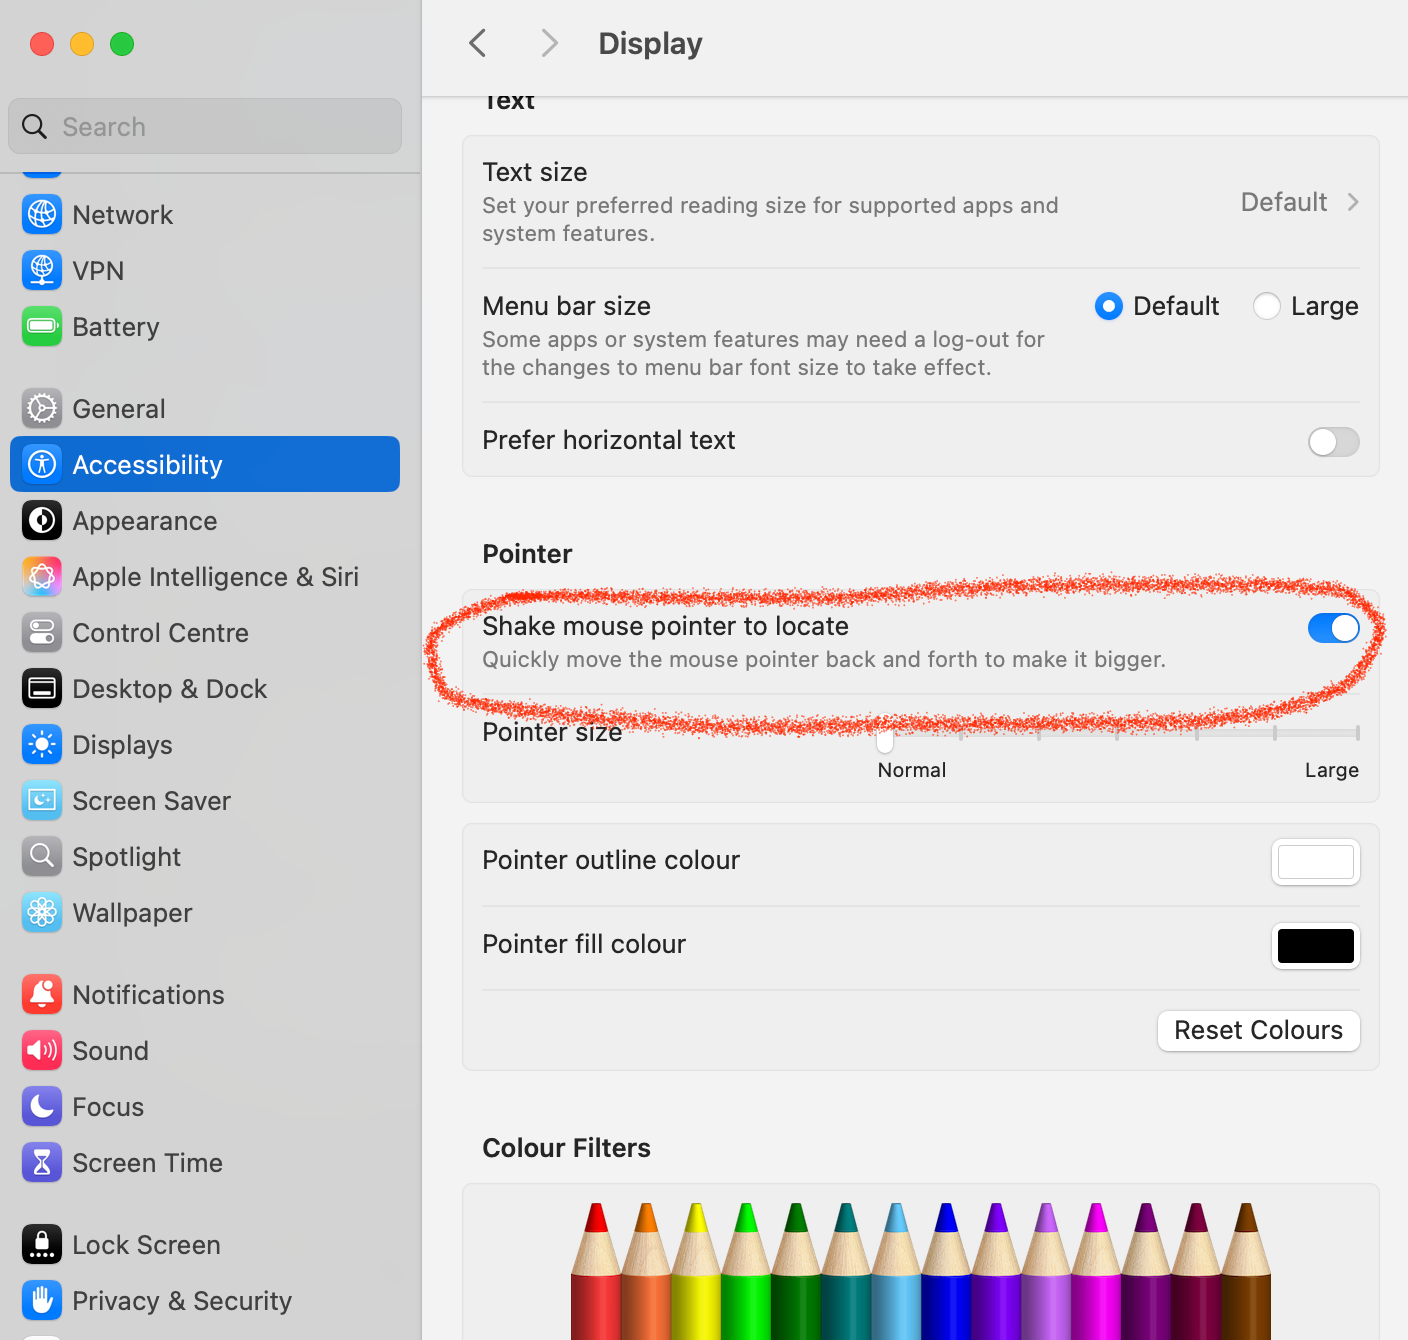
Also, just below that, you can also set the pointer size if the normal pointer is too small.